How to Attach Your Mount'n Mover: Step 8

Attach the Device to the Mount and Adjust Its Position

OVERVIEW | STEP 1 | STEP 2 | STEP 3 | STEP 4 | STEP 5 | STEP 6 | STEP 7 | STEP 8

Mount’n Mover, Locking Version

See Quick Guide or refer to How it Works page to understand how to set lock positions, move the arm and adjust and lock the tilt angle.

  1. Attach device. 
  2. Position in best “use” position.
  3. Adjust tilt angle.
  4. Set lock position at each joint.
  5. Set other lock positions if desired.

How to Adjust Mount'n Mover Position

Depress hoops to unlock elbow and should joints. Move it from lock position. To find lock position, release downward pressure on hoop and more until arm stops:
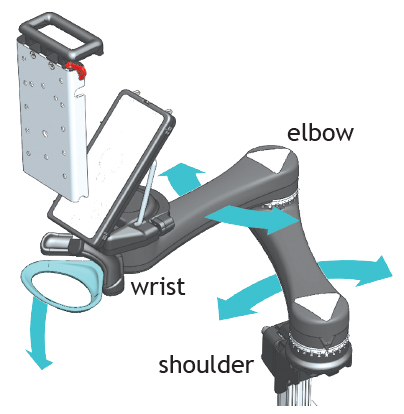
Mount'n Mover Dual Arm Wheelchair Mount

Depress paddle to release the write lock. Move it. Write will remain unlocked until it reaches lock position:
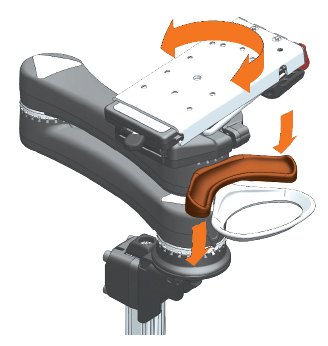
Adjust Wheelchair Mount - How Mount'n Mover Paddle Works

Slide the lever to the right and unlock the tilt-plate. Position the tilt-plate to the desired orientation. Slide the level to the left to lock the tilt-plate:
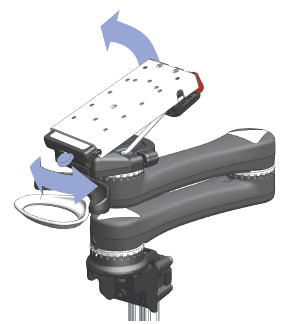
Mount'n Mover Tilt-Plate Locking Lever - Wheelchair Device Mount

Initial Set Up

Flip up all lock tabs so joints move freely with no lock positions. Orient to best fit user needs; move black arrow to nearest lock tab; slide lock tabs down to set locks. You cannot unset a lock tab with the black arrow directly above it:
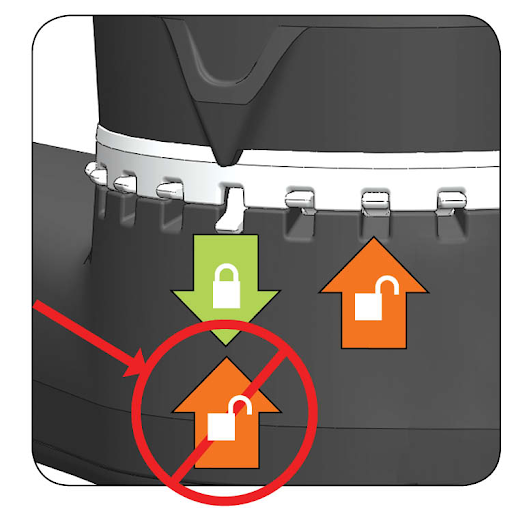
Wheelchair Mount Lock Positions

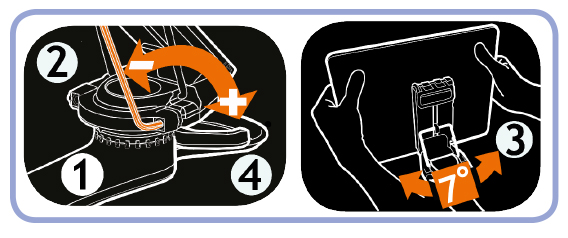
Fine Tune Wrist

  1. Set lock.
  2. Loosen hex head bolt.
  3. Adjust device orientation 7 degrees.
  4. Tighten hex head bolt.

Mount'n Mover Tilt-Plate Adjustment - Wheelchair Device Mount

Lock Setters Provide Repeatable, User-Specific Positions

  • Lock position: When the black arrow is above a lock setter that is down, it will lock.
  • Bypass position: Lock setter is up.
  • To set a lock position, slide a lock setter down
  • To create a bypass location, flip a lock setter up.
  • NOTE: You cannot unset a position when the black arrow is above it!

Additional Steps for Eye Gaze Systems

  1. Adjust the Fine Tuner (see Quick Guide for visual images)
    • Set the closest Lock position
    • Loosen the hex head bolt on the back of the wrist (½ turn left)
    • Adjust the device rotation (+/-7 degrees) to face the person
    • Tighten the hex bolt (to right)
  2. Adjust the Universal Rotator. The Rotator allows you to adjust the orientation of the device so it is aligned with the person’s face and eyes.
  3. Individuals who need their device to face downwards may use the Stand + 90 

Easy Mover

  1. Attach the Easy Mover's Link cube to the post
  2. Move the Easy Mover
  3. Change the resistance with the 3/16” hex key with the ball joint

Simple Mount

Review the Simple Mount instructions.

Congratulations! You're finished.

« BACK TO STEP 7

« BACK TO OVERVIEW

Questions? Contact Us.

Do you have questions about how to mount your Mount'n Mover? We're here to help. 

Our business hours are 9am-5pm CST Monday through Friday. 

Call us at 612-724-7002.